Monday, August 29, 2011

Marker Mondays - August Part IV

This card will use the blending techniques we have been practicing and you will learn a simple masking technique. Be sure to review the previous lesson if you need to.
All Supplies Available from A Muse Studio
For August are using the following three Copic colors:
  • 0 - Blender Pen
  • R29 - Lipstick Red
  • Y17 - Golden Yellow
For these images I used the brush to brush color technique that I explained last week.  If you are using the Originals markers (the square Copics) then I recommend switching to the brush tip.  It is easy to switch the tips and they are fairly inexpensive.  If you prefer not to do that you can still blend using your chisel and fine point by using the plastic palette technique to pick up the darker ink.

Stamp the large flower in the corner using your Memento Black ink and then color it using the technique that you practiced last time.  I colored the entire flower yellow and then added red in the center.  I darkened each petal as needed by adding a second layer of yellow and then using the marker to pick up some red and make the petals a darker orange.  Blend while the yellow is still wet and do each petal individually.  Add some yellow over the top if you need help blending.

Once the large flower is colored then you can mask it by stamping another flower onto a post-it note and cut carefully just inside the edges.  Place the post-it note flower over the colored flower to protect it and use the smaller flower stamps to stamp your papaya, orange and cherry flowers with our delicious rich ink.  Once it is dry you can remove the mask.

Stamp your sentiment, add pearls (color them first with your Copics if desired) and mount onto black card front and orange card base.  Voila!  This concludes your Copic lessons for August.  Next week I will give you a head's up on what is needed for September.

 Marigolds Card Supplies Used:

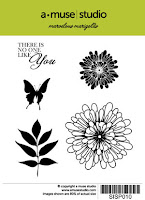
  • Marvelous Marigolds Stamp Set
  • Paper - Sugar, Onyx, Orange
  • Memento Black Pad
  • Copic Marker - Colorless Blender
  • Copic Marker -  Lipstick Red
  • Copic Marker - Golden Yellow
  • A Muse Studio Inks - Cherry, Papaya, Orange
  • Pearl Stickers - Sugar

Marvelous Marigolds

All Supplies Available from A Muse Studio

I will be holding a monthly workshop in my home in Huntington Beach, CA so let me know if you want to join me.

Thursday, August 25, 2011

Goosebumps Cards

There's a new project from Tsukineko called Goosebumps.  I recently got a chance to try it and teach some of the stampers at our LSS about my findings.  Below are two of the projects we made.  I donated my cards to Operation Write Home to send a little love overseas for our Heroes.

Goosebumps sprayed on white paper as a background resist
For the first project (above) we simply spritzed some goosebumps on the paper and let it dry.  Once it is dry you can sponge on your favorite dye ink (I used Tim Holtz distress inks) and wipe any excess off with a damp towel.  The light blue part of the card is the TH ink and the white is where the Goosebumps acted as a textured resist.  It looks like a shiny, bumpy plastic.  Once you use the Goosebumps you will need to use Stazon to stamp over it so the teal leaves (Wendy Vecchi)  and  black sentiment (Auntie Amy) are stamped with Stazon.  I mounted it simply to a navy cardstock and then a purple card base.  I added some pretty rhinestones to give the card a little bling.

Goosebumps sprayed onto rubber and then image stamped on white paper
For our second project we sprayed directly onto the stamp instead of using ink.  A bold image works best for this.  I used another Wendy Vecchi image to make the white foliage at the bottom of the card.  It will give a blotchy effect and not the precise definition you are used to with ink.  Once the Goosebumps is dry you can swipe your dye ink over the card (again, I used Tim Holtz Distress for this in two different colors) and wipe any excess ink off the resist image with a damp towel.  I used black India Ink to stamp the "delight" sentiment from Stampin' Up.  Add a pretty ribbon and mount to your card base and you're done!  The card is easy and has a lot of impact.

Here are some tips I found while I was working with the Goosebumps:
  • Clean your stamps IMMEDIATELY after you use them with a good cleaner like Ultra Clean.  
  • Be careful because the Goosebumps may permanently stick to your acrylic blocks or will take lots of work to remove (sigh!)
  • IMMEDIATELY clean the whole Goosebumps pump with soapy hot water after you use it or it will get clogged.  I thought I just needed to rinse it off but you really need to remove it and clean it all thoroughly.  
  • It will still clog the tip of the sprayer so be sure to clean it with a pin and do some test spritzing before use or you will get blotchy sprays.
  • I was unable to get good results with the technique where they used a brass stencil.  Maybe my tip was too clogged and blotchy.
  • I was unable to get good results with the technique where they used a clean stamp to remove the goosebumps from the paper.  Maybe I was spraying too much Goosebumps onto the paper (again, could be the clogged tip)
  • I learned this was a little too much trouble to be my favorite technique but I did like the cards I ended up with.

Here is a link to the Tsukineko education sheet to give you more tips and techniques.  Let me know your experience with Goosebumps and any tips to help us out!

Tuesday, August 23, 2011

Studio Stampers Blog Hop

Welcome to our A Muse Studio Blog Hop for Krystie's Muses group.  You should have come from Kari's Blog.  If you want to go to the beginning go to Krystie's Blog

All Supplies available from my A Muse Studio Webstore
Supplies used: Stamps - Too Cute To Spook
Ink - Onyx
Papers - Wasabi, Spooky Hollow, Slate Woodgrain
Dies - Classic Tags Die Set, Web Die
Accessories - Onyx & White Baker's Twine-


Your next stop is Kellie's Blog


Here is the blog list in order:


Sunday, August 21, 2011

2011 A Muse Studio Holiday Catalog

All supplies available from my A Muse Studio Webstore.

I am so thrilled with the new A Muse Studio Holiday Catalog that just debuted.   Please let me know if you would like me to mail you a copy or email a pdf.  You can also see it and order online HERE.

There is a rotating graphic on the top of the home page with a link to download the catalog and you can order using the regular order process now.

If your order subtotal is $150 or more be sure to email or phone your order to me so I can set it up as a workshop so you will earn extra hostess benefits!


Stay tuned tomorrow (Tuesday) for a blog hop featuring some awesome holiday goodies.


A*MUSE*A*PALOOZA DAYS ARE HERE!

All supplies available from my A Muse Studio Webstore

The best time of the year starts tomorrow!  Are you wondering what A*MUSE*A*PALOOZA is?  It's an awesome stamping extravaganza that is hosted by A Muse Studios.  When they changed to a home sales model, the company decided to keep the fun and festivities going. 

What does A*MUSE*A*PALOOZA mean for you?  Well, if you host a workshop there are extra goodies available from August 22-September 30th.   Below are some of the highlights but be sure to contact me for full details.

  • With a $150 party you can earn an exclusive limited-edition stamp set that is only available during this celebration.  
  • I am giving a special hostess gift to all my hostesses with a $150 party - your choice of a Gold or Silver Uniball Pen
  •  A Muse Studios is also giving extra hostess credits to qualifying parties of $250 or more.
Our new Holiday Catalog debuts at Midnight tonight!
Email me for an advance copy of the catalog in PDF format or check back at midnight to see the catalog online.


Monday, August 15, 2011

Marker Mondays - August Part III

Today we will practice and refine our blending techniques.  Be sure to review the last lesson if you haven't already.

Workbook notes and A Muse Studio coordinating ink samples
 For August are using the following three Copic colors:
  • 0 - Blender Pen
  • R29 - Lipstick Red
  • Y17 - Golden Yellow
For these images I used the brush to brush color technique that I explained in the last post.  If you are using the Originals markers (the square Copics) then I recommend switching to the brush tip.  It is easy to switch the tips and they are fairly inexpensive.  If you prefer not to do that you can still blend using your chisel and fine point by using the plastic palette technique to pick up the darker ink. 
You can make different flower colors with only three pens!
I have colored the top right flower with yellow ink and then used the yellow pen to blend red onto the center petals and make the flower into a deeper orange.  It takes time and practice but you can always color and then add more depth later on and blend out any parts you want to darken or fix.

The center yellow flower was colored first with the blender pen and then the blender pen is carefully used to make the pale yellow petals by taking ink from the Y17 pen or palette. This flower takes a little more practice and patience. 

The pink flower was the hardest because the red is so dark.  Work one petal at a time with the blender pen and pick up tiny amounts of red to blend with.  Practice, practice, practice!  I really did this flower using only the blender pen and the R29 ink.  You can too!

Practicing blending on Vanilla cardstock and Cocoa ink. Notice the warmer feel of the images?
It is fun to try the Copics on different backgrounds to see how they change.  I made the same yellow and orange flowers on Vanilla instead of Sugar paper to add some warmth.

Marvelous Marigolds

I will be holding a monthly workshop in my home in Huntington Beach, CA so let me know if you want to join me. 

Monday, August 08, 2011

Marker Mondays - August Part II

Let's start today's lesson by playing and getting used to our pens.  Here is the last post if you need to review or have questions about the workbook supplies and pages. For August we are using the following three Copic colors:
  • 0 - Blender Pen
  • R29 - Lipstick Red
  • Y17 - Golden Yellow


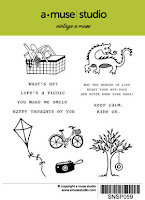
Start by stamping the kite image using Memento Black ink and let it dry.  In my workbook I like to label images as I color them by using the Copic Multiliner.  This is a waterproof pen that will not smear when you use your Copic Markers over it.  I can draw lines, take notes and then color over it just like I can with the Memento ink.  Make a habit of making color swatches like I did on the bottom left.  That way if you want to replicate a look later you know exactly what colors you used.
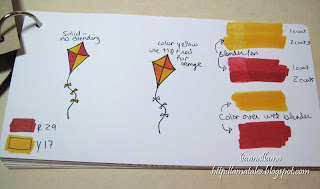

Workbook Page1
The kite on the left I colored using the markers with solid colors and no blending.  The kite on the right uses some blending techniques.  I colored the whole kite with yellow and then I blended using my yellow pen and picked up red ink from a palette onto the yellow pen to make orange.  I made a palette by scribbling some red ink onto a piece of plastic.  Any plastic will do, including  an acrylic block, plastic palette or a scrap of a cellophane wrapper.
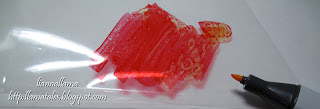
Palette Blending
A second way of blending is the tip to tip method where you pick color directly from the tip of your dark marker onto your light marker and use it to color.  The best part about using Copics instead of water-based markers is you can wipe off the excess color onto your paper when you are done and the marker is as good as new!  The ink does not stain the marker when you blend colors.  Try it out and be sure to practice because with blending you will get better with more you do it. 
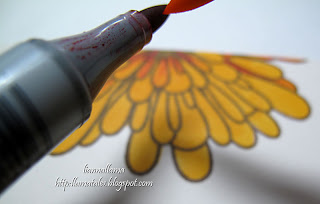
Tip to Tip Blending
Use your workbook to practice blending and be sure to play with the pens.  Look at the right side of my workbook page and see how I experimented with different layers of marker.  Letting each coat dry before adding another will make a darker color that you can use to subtly deepen shadows without having to use a darker color pen.  The blender pen acts as a sort of ink-removal system so you can use it to erase or lighten colors for highlights.  If you color over the wet blender, it acts as a sort of primer and helps spread the ink over the paper for easy blending.

If your paper gets too wet the ink may start to spread too easily; simply let it dry and then you can use your markers again to re-blend and fix anything you want.  If your coloring is not solid and looks streaky then you are not using enough ink.  Be sure to saturate the paper thoroughly and the ink should show through on the back (unless you are using extra-thick paper).  Don't be afraid to use lots of ink because your paper will not pill and tear the way it does with regular water-based markers.
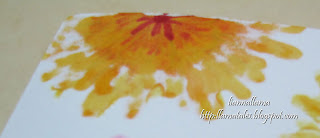
Back side of colored flower
 Once you have had a chance to play then you can color the image for your card and finish it! 
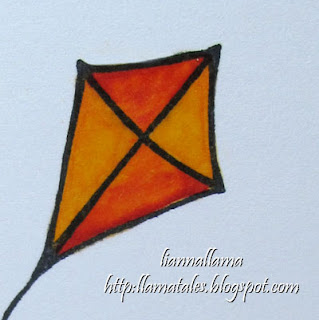
Detail of finished colored image
Kite Card Supplies Used:
  • Vintage A Muse Stamp Set
  • Paper - Sugar, Orange, Cranberry
  • Gingham Paper - Orange
  • Memento Black Pad
  • Copic Marker - Colorless Blender
  • Copic Marker -  Lipstick Red
  • Copic Marker - Golden Yellow
  • 3D Foam Adhesive
  • Nestabilities Scallop Rectangle - Small
Marvelous Marigolds
Vintage A Muse

I will be holding a monthly workshop in my home in Huntington Beach, CA so let me know if you want to join me.  

Tuesday, August 02, 2011

Sneak Preview!

Welcome to another edition of the A Muse Studio Blog Hop. If you are participating in the blog hop, you should have come from Tara Johnson's blog and if not, then you should start from the beginning with Samantha's blog until you come to my blog.
All Supplies from A Muse Studio
Our theme today is "Summer" and what is more Summery in Huntington Beach than a Beach Wedding card!?  So many people here get married near the beach or with a beach theme I thought it would be fun to show how pretty our shells stamps look in soft pale colors.

Are you in LOVE with the pretty ribbon I used?  Did you notice how it matches the pretty ink I used for the background.  It is a sneak preview of our new "Pebble Gray" color that I just adore.  Doesn't it look pretty stamped on the Vanilla?  I paired it with some Latte accents and a pearl and it coordinated beautifully.  I added some pretty glitter to glam it up and make it extra pretty.  The Tag is also a preview of our New Tag Dies and the French Roast Baker's Twine is also available in our new Holiday Catalog.  You can order from it starting on August 22nd but in the meantime if you want to see a PDF of the catalog, please send me your email address and I can a catalog to you right away!

Supplies Used:
  • Sea Shells Stamp Set
  • Latte Paper
  • Vanilla Paper
  • Pebble Ink
  • French Roast Ink
  • Classic Tags Die Set
  • French Roast Baker's Twine
  • Pebble Satin Ribbon
  • Diamond Glitter
  • Quickie Glue Pen
  • Latte Pearls
Your next stop on the hop is Melissa Roell's Blog.

Monday, August 01, 2011

Marker Mondays

Do you want to learn how to use - Copics with me?  Let's start a new adventure where you can learn and have an easy way to start your Copic collection without having to buy a ton of markers at once.  With my class we will use three markers each month (plus the blender pen) to make some awesome creations.  I picked some of my favorite and most useful colors so we will have a great collection and actually be able to use the markers we have.  We will end up with workbook pages and two cards each month using our three colors.

Workbook Cover
For my workbook cover you can see that I used one flower for each of the five months and colored  each flower using the three monthly colors.  I used Kraft paper for fun but you can use whatever you want.

For August we will use the following three Copic colors:
  • 0 - Blender Pen
  • R29 - Lipstick Red
  • Y17 - Golden Yellow
You can use Ciaos, Sketch or you can buy the Originals from my A Muse Studio Webstore (or anywhere else you like).

Here are the other supplies I used for the August Workbook and almost everything is available from A Muse Studios or feel free to substitute your favorite brands.
  • Kraft Cardstock
  • Sugar Cardstock
  • Vanilla Cardstock
  • School Lined Cardstock 
  • Marvelous Marigolds Stamp set
  • Personal Stationery Stamp Set (optional)
  • Memento Black Ink
  • Memento Rich Cocoa Ink (optional)
  • Copic Multiliner (I use the 0.5 size) 
  • Corner Rounder
  • Crop-a-Dile or hole punch
  • Scrap of Cellophane paper wrapper
  • 2" Metal Ring (from office supply store)
To start your workbook cut the papers to 8.5" x 4.25" as following:
  • 2 Kraft (for the covers)
  • 2 Sugar
  • 1 Vanilla
  • 1 School Lined
Round the right side's corners and  punch a hole in the left corner using your crop-a-dile.  The metal ring is to hold it together when we're done.  I recommend working on the pages individually and put them in the ring after you finish.  Otherwise your Copics may bleed through to the next page and it won't look as clean!

Marvelous Marigolds
Vintage A Muse

I will also be holding a monthly workshop in my home in Huntington Beach, CA so let me know if you want to join me.  

Sunday, July 24, 2011

Memory Box Collection

Memory Box supplies from StampinEJ
I was so excited to get my package filled with beautiful new stuff from Memory Box this month!  I immediately fell in love with the new Woven Circle Die and I knew I would have to use it on almost every card I made that week.  It's deceptively simple but you can see I used it to make a flower, a scalloped border and a frill to put behind my sentiment.  I had fun punching it out of book paper (from a Jane Austen novel) and patterned cardstock (the oh-so-pretty Valise 6x6 collection from Memory Box) and putting it everywhere I could! 

Memory Box supplies from StampinEJ
I started by stamping the lovely Birch branch onto some aqua cardstock and added some pretty Valise collage paper for the background.  I stuck a bit of edged paper lace on the side and tied with a ribbon.  I knew the text-page flower would be the perfect focal point.  I used a vintage rhinestone button from my collection and three layers of punched papers.

Memory Box supplies from StampinEJ
My second attempt at using the die had me cutting it out of the same cardstock I used for the background.  If you look closely you can see how I matched the cardstock medallion to the same part of the full-sized sheet that is the background.  Then I popped the sentiment with foam tape after inking the edges.  The background sheet is colored with Copic markers and then the Birch Branch is stamped and embossed using colored ink and clear EP.  The whole thing is mounted on the prettiest-ever tangerine cardstock.

Memory Box supplies from StampinEJ
For my next card I thought it would be fun to make a scalloped edge.  For some reason this one reminds me of the Spirograph drawings I used to do as a child.  I love the look of the swirls against the black.  I stamped the tree onto the paper and then darkened and enhanced it by coloring with Copics and Prismacolor pencils.  I added gold and coral colored pearls for fun.  The sentiment is stamped onto two strips of washi tape for a different effect.

Memory Box and TH20 supplies from StampinEJ
For my final Memory Box card I skipped the die and embossed the forest two times onto some Bristol paper.  Then I colored using my Twinkling H20 watercolor paints.  You can look at the detail to see how it shimmers.  I mounted the sheet behind some torn Valise paper and added a sentiment.


Memory Box and TH20 supplies from StampinEJ
I hope you enjoyed my projects today because I sure had fun making them!

Memory Box Supplies Used:
Patterned Cardstock -Valise 6x6 (10136)
Stamps - Stand of Trees (E1759), Tree of Blooms (G1769), Makes Me Smile (B1765), Birch Branch Print (G1720)
Die - Woven Circle (98114)

Sunday, July 10, 2011

July 10th Blog Hop

Welcome to our A Muse Studio Blog Hop for Krystie's Muses group.  If you want to go to the beginning go to Kathy's Blog.

Thanks for stopping by!  Today I am featuring a card that uses the pretty Sea Shells Set.  It is on sale until July 15th. You can also get a limited edition "Seaglass" paper pack that includes 4 sheets each of 5 lovely papers; Bermuda, Latte', Sky, Lichen and Sage.
All supplies available from my A Muse Studio Webstore.
Supplies: 
Paper - Bermuda, Shell, Late, Amethyst
Stamps - Sea Shells, Essential Sentiments
Other - Ivory Pearls, Diamond Glitter, Spring Washi Tape
Ink - Ocean, Sky, Latte', Shell


Your next stop is KRISTEN'S BLOG


Here is the blog list in order:
Kathy Hatzke
Lisa Chapman
Lianna Vigil (YOU ARE HERE!)

Saturday, July 02, 2011

A Muse Studio Blog Hop

Welcome to another edition of the A Muse Studio Blog Hop.  Happy Independence Day if you are from the US or if not I hope you have a great weekend doing what you love best!  If you are participating in the blog hop, you should have come from Anna Keyes' blog and if not, then you should start from the beginning with Samantha's blog until you come to my blog.

All suplies from A Muse Studio available at my Webstore.
Today I chose a festive color palette of Red, White and Blue but I added a little yellow for fun!  I made the dots and stripes border using a red Copic marker and finished it off with a sweet sentiment and a little bit of stripes.  This card reminds me of stars and stripes with some flowers and fireworks thrown in for good measure! Hope you enjoy your fireworks, everyone!


Now on to your next stop Patty Mowery's blog.

Friday, June 10, 2011

A Muse Studio Blog Hop

Welcome to our A Muse Studio Blog Hop for Krystie's Muses group. I thought it would be fun to do another ice cream card.

Supplies Used:
Cardstock: Vanilla, Bubblegum, Blush, French Roast Polka Dots
Ink: French Roast
Stamps: What's the Scoop Set
Ribbon: Bubblegum 5/8" Satin
Pearls: Vanilla


All stamps and supplies from my A Muse Studio webstore
If you want to start at the beginning of the hop please go to Krystie's Blog. Your next stop is KELLY'S BLOG.

If you get lost, here is the complete list:
Krystie Hersch
Lianna Vigil YOU ARE HERE
Kellie Maggio
Kari Bell
Kristen Watson
Veronica Zalis
Kathy Hatzke
Kelly Spivey
Lisa Wakabayashi
Karen Crisp
Kristie Hartfeil
Angela Schellenberg
Heather Wroe
Krystie Hersch

Thursday, June 09, 2011

Bunny Love!

Marianne Walker from Copic, CHA Winter 2011
I think Marianne Walker is awesome!  She is
one of the instructors for Copic and I got my certification from her a few years ago.  On top of being a great teacher and super nice she is an awesome artist!  Sometimes we are lucky enough to be able to purchase her art.  She designed the cutest set of Bunny stamps for Our Craft Lounge and the second I saw it I knew I would have to have it.

Above she is showing off her original art that matches one of the stamps.  You can see her amazing Copic coloring tutorial here.

Our Craft Lounge Stamps from Stampin' EJ
Since I know I can't compete with her amazing Copic skills on the parasol bunnies I thought I would try my hand at the lovely image of the bunny family in the ginger jar.  I wanted to use non-frilly colors and give a different feel to the image so I started with some beautiful washi paper and took my color scheme from there.  I picked up the golden colors to use for the jar and accented with the same greens and pinks.  For this card I used a combination of Copics and Prismacolor Pencils to get just the right look.

The floral spray on the side is colored entirely in pencil to match the paper and the jar.  The ribbon was colored with my Copics to get just the right match.  It works wonderfully but will make your ribbon a bit stiffer than usual.  The jar is colored in Copics but then I added some auburn pencil over the copics in the corners to make the shadows deeper and richer.
Our Craft Lounge Stamps from Stampin' EJ

Finally we come to the sweet girl holding a bunny.  If you want to see how Marianne colored it then click here.  I decided to use my blender pen and dye ink to color this image.  The left side of the gatefold uses some lovely washi paper and the right side has the image embossed using copper EP.  then I made a watercolor effect by putting some ink onto the lid of the stamp pad and then using a blender pen as a brush.

Wednesday, June 01, 2011

Birthday Blog Hop

All supplies available from my A Muse Studio Online Store.
Welcome to our blog hop.  If you are participating in the blog hop, you should have come from Kristie's blog and if not, then you can start from the beginning with Samantha's blog until you come to my blog.

It's my Father in Law Diego's birthday so I made this card for the blog hop.  I always have trouble with guy cards because I always want to add too many frills on a card.  But I am learning that simple is better!  Today's challenge was to make your own patterned paper but I wanted to keep it bold and graphic looking.  (For some reason I didn't think the backgrounds I made with flowers would work for his card, ha ha!)

I used the "Tini Time" stamp set diamond border to make the backgrounds with the lovely A Muse Studio pigment chalk ink.  Unlike dye ink, this ink will actually show up when you stamp on darker paper.  So the Grass ink looks awesome both on the Ocean and the Onyx cardstock.  I love how you get two different looks from the same exact pattern.  On the Ocean you notice the diamonds more but on the Onyx you see the "white space" of the circle pattern instead and the diamonds recede into the background.  The birthday sentiment is Contemporary Greetings.

All supplies available from my A Muse Studio Online Store.
I wanted to make sure to show you the inside of the card because even though I didn't decorate it I love the fact that A Muse Studio paper is white on one side so you don't have to waste time lining your cards when you use dark cardstock.

All supplies are available from my A Muse Studio Online store.


Happy Birthday to my dear Father in Law--I am so lucky to be part of your family!

Your next stop is  Lindsay Spencer's blog.

Saturday, May 28, 2011

Operation Write Home Memorial Weekend Blog Hop


Welcome to the Operation Write Home Blog Hop!  You should have arrived from Kris' Blog.

Supplies available from https://www.amusestudio.com/liannallama
My Card today uses A Muse Studio Papers, Inks and Supplies along with the heart stamp from the "Hearts A Plenty" set (or get it in your Consultant Starter Kit) and the sentiment from the "On the Wing" set.

Supplies available from https://www.amusestudio.com/liannallama
 Your next stop is Karen's Blog! Enjoy!

Saturday, May 14, 2011

One Card - three color schemes!

All papers, stamps and border punch from Stampin' Up.
I thought it would be fun to make some cards with the cute hostess set I got from Stampin' Up a couple of months ago.  I haven't had a chance to use it yet.  I couldn't decide which colors to use so I used three different combos!  The cute pearls and rhinestones (from A Muse Studios) add the perfect
touch to the center of each little flower.
Very Vanilla, Ruby Red, Cameo Coral, River Rock
I thought I would like the coral card the best until I made the blue one.  It was so soft and sweet it reminded me of old china and I knew my Aunt would like these colors together.
Very Vanilla, Bordering Blue, Not Quite Navy, River Rock
But then I made the cocoa card and it had such a pretty vintage feel and the brown pearl gave it a warm glow.  My great aunts loved earth tones and I know Ellie would have approved of this card for sure.  Sometimes neutral colors are good for general cards and they have a homey feel and coziness about them.  What do you think?  Which one is your favorite?
Very Vanilla, Creamy Caramel, Close to Cocoa, River Rock

Sunday, May 01, 2011

Happy Birthday, Moira!

All stamps and supplies from A Muse Studio

Welcome to our A Muse Studio Blog Hop for Krystie's Muses group.  Last weekend was Moira's birthday.  She turned nine and we had an awesome vampire dance party in her honor!  This is the card I made her (not very "goth" but I thought she would also like something sweet!)

Supplies Used:
Cardstock: Sugar, Buttercup, Buttercup Gingham
Ink:  Memento Black, Papaya
Stamps: What's the Scoop Set, Harlequin Background
Nestabilities Scallop Squares, Squares

Copics: Blender pen, RV06, BG13


If you want to start at the beginning of the hop please go to Krystie's Blog.Your next stop is LISA'S BLOG

If you get lost, here is the complete list:
Krystie Hersch - http://www.cleanandsimplecards.com
Kathy Hatzke - http://www.kathatstamps.blogspot.com
Kelly Spivey -http://www.southpawpaperarts.com
Liane Vigil - YOU ARE HERE
Lisa Wakabayashi - http://www.dragonfliesandcats.blogspot.com
Lesa Wolfe - http://www.thepaperpundit.blogspot.com
Lisa Chapman - http://www.piesafepapergoods.blogspot.com
Veronica Zalis - http://lk2thestarz.blogspot.com/
Kari Bell - http://www.karikards.blogspot.com

Friday, April 01, 2011

A Muse Studio Card

All stamps and supplies from A Muse Studio
Welcome to our A Muse Studio Blog Hop.  If you want to start at the beginning please go to Krystie's Blog.Your next stop is KARI'S BLOG

All items can be purchased through me or on the A Muse Studio websiteAnyone who places a $50 or more order will get a free pack of pearls or rhinestones of your choice.

Anyone who hosts a qualifying workshop in May or June will get a free A Muse ink pad along with all your other wonderful gifts!

Friday, March 18, 2011

A Muse Studio Stamping Workshop Open House

Lovely project form A Muse Studio website!
I am planning two FREE open house events next month to kick off my new stamping workshops. [Thursday, April 28th at 6:00-9:00 pm] and [Saturday, April 30th at 2:00-5:00 pm] I hope you can make it to one of them!

PLEASE RSVP SO I CAN MAKE SURE TO HAVE ENOUGH SUPPLIES! Friends are always welcome so please bring someone for a chance to win a prize!

THE FORMAT:
...This is a FREE stamping workshop to introduce you to the art of rubber stamping and card-making. There is no obligation except to come and have fun! I will have three make-n-take card projects for guests to complete; a new one will be featured each hour! If you come for the whole event you can make up to three different cards or if you just want to stop by for a quick visit you can make whatever card that is presented for that hour! I will have everything prepared for you and all supplies set out.

THE PRODUCTS:
A Muse Studio is a company that has been around for years but they just started doing home sales.

Here is a link to the current catalog:
https://www.securedcontent.net/amuse/pdfs/2011AMuseStudioCatalog.pdf

Online ordering available.

Anyone who places a $50 or more order will get a free pack of stickers of your choice.

Anyone who hosts a qualifying workshop in May or June will get a free A Muse ink pad along with all your other wonderful gifts!