Monday, September 19, 2011

Marker Mondays - September Part III

 For September we are using the following three Copic colors and the clear blender pen
  •  R32 - Peach
  • YG21 - Anise
  • B24 - Sky Blue
  •  0 - Blender Pen
This lesson is going to be a little different (and uglier!) so I apologize in advance.  Our next lesson will be using the shimmer paper so I wanted to experiment with different techniques to show you.  The shimmer paper is so lovely--it looks like an icicle or a pearl with a beautiful sheen to it and a perfect weight.  I am using the Sugar color and it is more of an Antique White instead of hard white.  The colors of this paper are colored or printed on one side and white on the other side.

The picture below shows how I tested the memento inks.  You can use this ink on the shimmer paper but you must be very careful to not go over the lines so you don't smear it.  I recommend writing on this paper using a Copic Marker set with a superfine tip.  The Multiliner pen will take FOREVER to dry.

Memento ink will spear on the shimmer paper and the Copic Multiliner pen will take a long time to dry. 
 Below you can see where I embossed using Versafine and Black EP. It also smears and the Copic solution will dissolve the EP so I don't recommend embossing either unless you are careful not to color over the lines.

But a bonus is that the paper works wonderfully with our A Muse Studio ink if you just want to stamp.  See the Blueberry flower in the corner?  That is our ink and it looks beautiful.  Still, it will smear if you color over it with the Copics.
Embossing will also smear with the Copics.  If you want to emboss be careful to stay in the lines!
Below are my notes on the shimmer paper.  The cute Snoopy stamp is one that I got in Japan.  I stamped with Brown Memento ink and colored it very carefully so I didn't color over the lines.

 Things to remember with Shimmer Paper and Copics:
  • Shimmer Paper is BEAUTIFUL
  • Shimmer Paper is touchy
  • Memento washes off and smears
  • Copic breaks down embossing
  • Multiliner takes a long time to dry
  • Copic ink will spread differently on this paper because it does not sink into it like regular cardstock.  It lays on the surface and make pools and patterns.  (You can see this effect best if you look at the blue petals in the picture above.)

Shimmer Paper notes and swatches

Supplies Used:
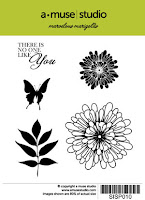
  • Marvelous Marigolds Stamp Set
  • Shimmer Paper - Sugar
  • Memento Black Pad
  • Versafine
  • Black Embossing Powder
  • Multiliner
  • Black Copic Marker
  • Ink - Blueberry
  • Ink - Watermelon
  • Ink - Bubblegum
  • Copic Marker - Colorless Blender
  • Copic Marker -  R32 - Peach
  • Copic Marker - YG21 - Anise
  • Copic Marker - B24 - Sky Blue
Marvelous Marigolds


All Supplies Available from A Muse Studio

I will be holding a monthly workshop in my home in Huntington Beach, CA so let me know if you want to join me.  

Monday, September 12, 2011

Marker Mondays - September Part II

All supplies available from A Muse Studio

 For September we are using the following three Copic colors and the clear blender pen
  •  R32 - Peach
  • YG21 - Anise
  • B24 - Sky Blue
  •  0 - Blender Pen
This card is a simple card but it is so cute!  I cut my card base out of the Clouds paper and then used my Square Nestabilities to make a die cut in the front of the card.  The stamping is done on the inside of the card with the Black Memento ink.  Bicycles are so popular right now and I love the cute sentiment we have for this one: "Keep calm. Ride on."

Remember we are only using three colors here so I started by coloring the dark parts of the bike first with the Sky Blue.  Then I added the light parts using Anise.  Can you see how I feathered that into the blue parts to blend it?  It's the little touches that add so much to your image here. The basket is colored using Anise and Peach.  I blended them a tiny bit on part of the basket to make a third color to add some interest to the woven texture.

This image is so cute and tiny there's not a lot of room for blending so we are done!  If you want to add a bit of shadow under the wheels you can use your blender pen and the Sky Blue to add a wee bit of color there to help ground the image.  Hopefully you stamped plenty of extra images in your workbook so you can experiment!

Detail of finished colored image
Supplies Used:
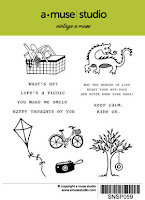
  • Vintage A Muse Stamp Set
  • Paper - Sugar, Clouds
  • Memento Black Pad
  • Copic Marker - Colorless Blender
  • Copic Marker -  R32 - Peach
  • Copic Marker - YG21 - Anise
  • Copic Marker - YG21 - Anise
  • B24 - Sky Blue
  • Nestabilities Squares - Large
Vintage A Muse


All Supplies Available from A Muse Studio

I will be holding a monthly workshop in my home in Huntington Beach, CA so let me know if you want to join me. 

Sunday, September 11, 2011

In Remembrance

This post is in Remembrance for Lisa Frost and all the others who were affected by the events that happened ten years ago.  I didn't know Lisa but she lived in the town where I used to live; Rancho Santa Margarita.  Here are some pictures of her memorial by the lake.  You can read more about her here.

Here is my post I did five years ago as part of the 2,996 Project to honor those who lost their lives on this day.

I can't believe that it's been ten years since this happened.  The sorrow I felt from that day and other events that were happening at the time changed my whole life.  I resolved to enjoy more moments in my life and not take any minute of any day for granted.  I resolved to take better care of my life and my self and to cherish every moment that I can.  I became a little more serious and a little more careful.  I try to live more in the moment and worry less about the future (which you know does not come easy for me!) I try to be gentle with myself and those around me.  I hope that 9/11 has made me a better person, despite the pain that we all still feel for this day.  (((HUGS))) and prayers to everyone as we go on with our lives and live our moments today.

Saturday, September 10, 2011

Studio Stampers September Blog Hop

Welcome to the Studio Stampers Blog Hop.  You should have come from Lisa's Blog.  If you want to go to the beginning go to the Studio Stamper's Blog

This month I am hosting some fun treat workshops so people can make Halloween treats for school, work, or whatever they want.  These boxes are so fun and easy to make and you can fill them with anything you like.  I filled mine with about 10 Starburst or 5 Tootsie Roll Minis.

See below for scoring template. Cut out and score as indicated and stamp as desired.  I rounded my corners because I thought it added a nice touch but that is optional.  Punch holes in the top corners of the box and then fold the box up to measure the holes on the opposite sides.  Punch the remaining two holes (each corner will now have a hole) and thread through with pretty ribbon and tie in a knot at the top after filling with goodies.  Add a die-cut seal or decoration on top and you are good to go!

All Supplies Available from my A Muse Studio Store
Your Next stop is Angie's Blog

Supplies used:  
Stamps - A Very Spooky Boo Day, Make a Scene
Ink - Nutmeg & Squash or
Onyx & Orange Papers - Kraft; French Roast & Squash or Onyx & Orange
Dies - Nestabilities Classic Scallop Circle and Circle dies
Accessories -
French Roast or Orange Satin Ribbon


Cut paper 8 1/2" x 3 1/2" and score on gray lines as shown.
Here is the blog list in order:

Monday, September 05, 2011

Marker Mondays - September Part I

All supplies available from A Muse Studio
 For September we are using the following three Copic colors and the clear blender pen
  •  R32 - Peach
  • YG21 - Anise
  • B24 - Sky Blue
  •  0 - Blender Pen
We will also use the Blender Refill Solution and a small spritz bottle.  I like the Ranger Mini Misters.

If you want to prepare for the entire month's lesson you will also need:
  • Clouds paper (shown above)
  • Onyx paper
  • Shimmer paper - Sugar
  • A Muse Studio Onyx Ink
  • Memento Tuxedo Black Ink
  • Silver brads
  • Nestabilities - Large Square 
  • 3D Foam Mounts
Marvelous Marigolds
Vintage A Muse
All Supplies Available from A Muse Studio

I will be holding a monthly workshop in my home in Huntington Beach, CA so let me know if you want to join me. 

Thursday, September 01, 2011

Holiday Catalog Blog Hop

Welcome to the special Holiday edition of the A Muse Studio Blog Hop. If you are participating in the blog hop, you should have come from Pamela Fredrickson's blog and if not, then you should start from the beginning with Samantha's blog until you come to my blog.

Do you love Halloween crafting as much as I do?  I can't resist any stamps with witches or bats and the new A Muse Studio sets were right up my alley so I had to get them the first day I could order!  They will be useful for so many fun things from treat bags, to cards to decorations!

All supplies available on my A Muse Studio Webstore
I stamped the tree using Squash ink on Pumpkin paper and cut it out using fine tip scissors.  I then used the Woodgrain Background on top of the tree (French Roast) and the card front (Nutmeg) to add some interest.  The black plate was embossed using the Web/Swirls impression plate and cut to size.  The bats were a piece of Sugar scrap paper that I covered with the gridded washi tape before cutting it with the bats die.  Glue the bats down using your quickie glue, stamp your sentiment and pop up the tree using the foam squares.  A knotted ribbon completes the look.

A Muse Studio Supplies Used:
  • Stamps - Spooky Boo Day* , Too Cute to Spook* , Woodgrain Background
  • Papers - Pumpkin, Orange, Onyx
  • Inks - Nutmeg, Squash, French Roast, Onyx
  • Impression Plates - Web/Swirls*
  • Dies - Bat Trio Die*
  • Ribbon - 1/4" Stitched Grosgrain
  • Other - Washi Tape - Winter, Quickie Glue, 3-D Foam Adhesive
* Holiday Catalog Items


Your next stop is Amber Smith's blog.

Do you want me to send you this card and a sample of our two new paper colors?  Email me your snail address (liannallama AT gmail D0T com) and I will mail one lucky crafter this card and a Holiday Catalog too if you want, just let me know!