Showing posts with label copic club. Show all posts

Sunday, April 08, 2012

Happy Easter!

I made this card for the gals in my Copic Club.  It uses the colors we are focusing on this month.  The whole card was colored with only three colors and a blending pen.  I added a little sparkle with my Spica Glitter Pen too!  


All supplies available from my A Muse Studio Store
Copic Markers used:
  • BV00 - Mauve Shadow
  • B41 - Powder Blue
  • G82 - Spring Dim Green
Other Supplies:
  • Stamps: For Peeps Sake set from A Muse Studio
  • Solid Cardstock from A Muse Studio: Shell, Lemon Whip, Sugar
  • Gingham Cardstock from A Muse Studio:  Bubblegum, Sage, Sky, Blueberry
  • 1/4" Organdy Ribbon from A Muse Studio: Eucalyptus
  • Ink: Memento Tuxedo Black 
  • Spica Glitter Pen 

Wednesday, January 25, 2012

Spotlight Ends Tuesday Night!

Each month A Muse Studio has a special Spotlight where you can get products on sale for one month only. This month's spotlight includes the Quick and Cute Valentines set for 10% off through the end of January. See the image below for the other four sets you can get at a discount.  There's also a Limited Edition Rock Candy Paper Assortment that is on sale for $7.65 to help you make cute projects using the stamps.  Click here for more ideas using this month's spotlight.

Spotlight specials available through Jan. 31, 2012

My card today is a simple design colored by using 4 Copic colors and a blender pen. There's just a tiny bit of Cool Shadow on the inside edge of the bag and underneath his foot. Don't you love the tiny heart sticker I put in the bag for fun? The stripes are a combination of our patterned paper and a strip of our holiday washi tape. Easy Peasy and so cute!


Supplies Available from A Muse Studio
All Supplies from A Muse Studio.
  • Stamps: Quick and Cute Valentines (sale!)
  • Cardstock: Sugar, Cranberry (discontinued!), Onyx Gingham, Cherry Sweetheart
  • Ink: Memento Tuxedo Black
  • Copics: R24, E21, E37, BG10
  • Holiday Washi Tape
  • Twinkle Stickers Hearts

Quick and Cute Valentines

Tuesday, January 24, 2012

Farewell Old Friends

We need to take a quick break from previews because there is only one week left to order from the current and holiday catalogs!  Some wonderful items are being discontinued and I don't want you to miss out!  Click on my A Muse Studio Website to order.
Supplies Available from A Muse Studio

Today's card uses two discontinued products: The Mighty Jungle stamp set and the Polka Dot Pattern Cardstock.  If you want either of these items they are only available through the end of the month and when they sell out they are gone!  The polka dot paper will be replaced by a small pin dot pattern that is printed on Sugar paper instead of the larger irregular pattern that is printed on Vanilla. 

All supplies from A Muse Studio.

  • Stamps: Mighty Jungle (retiring!)
  • Cardstock: Vanilla, Cocoa, Polka Dots Grass (retiring!)
  • Ink: Grass, Memento Rich Cocoa
  • Copics: 0, R24, E21, E37, YG23
  • Nestabilities: Small and Large Standard Circles, Small Classic Scallop
  • French Roast Felt
  • 3D Foam Adhesive
  • Glue Dots
Mighty Jungle Stamp Set
Polka Dot Pattern Cardstock

Monday, September 19, 2011

Marker Mondays - September Part III

 For September we are using the following three Copic colors and the clear blender pen
  •  R32 - Peach
  • YG21 - Anise
  • B24 - Sky Blue
  •  0 - Blender Pen
This lesson is going to be a little different (and uglier!) so I apologize in advance.  Our next lesson will be using the shimmer paper so I wanted to experiment with different techniques to show you.  The shimmer paper is so lovely--it looks like an icicle or a pearl with a beautiful sheen to it and a perfect weight.  I am using the Sugar color and it is more of an Antique White instead of hard white.  The colors of this paper are colored or printed on one side and white on the other side.

The picture below shows how I tested the memento inks.  You can use this ink on the shimmer paper but you must be very careful to not go over the lines so you don't smear it.  I recommend writing on this paper using a Copic Marker set with a superfine tip.  The Multiliner pen will take FOREVER to dry.

Memento ink will spear on the shimmer paper and the Copic Multiliner pen will take a long time to dry. 
 Below you can see where I embossed using Versafine and Black EP. It also smears and the Copic solution will dissolve the EP so I don't recommend embossing either unless you are careful not to color over the lines.

But a bonus is that the paper works wonderfully with our A Muse Studio ink if you just want to stamp.  See the Blueberry flower in the corner?  That is our ink and it looks beautiful.  Still, it will smear if you color over it with the Copics.
Embossing will also smear with the Copics.  If you want to emboss be careful to stay in the lines!
Below are my notes on the shimmer paper.  The cute Snoopy stamp is one that I got in Japan.  I stamped with Brown Memento ink and colored it very carefully so I didn't color over the lines.

 Things to remember with Shimmer Paper and Copics:
  • Shimmer Paper is BEAUTIFUL
  • Shimmer Paper is touchy
  • Memento washes off and smears
  • Copic breaks down embossing
  • Multiliner takes a long time to dry
  • Copic ink will spread differently on this paper because it does not sink into it like regular cardstock.  It lays on the surface and make pools and patterns.  (You can see this effect best if you look at the blue petals in the picture above.)

Shimmer Paper notes and swatches

Supplies Used:
  • Marvelous Marigolds Stamp Set
  • Shimmer Paper - Sugar
  • Memento Black Pad
  • Versafine
  • Black Embossing Powder
  • Multiliner
  • Black Copic Marker
  • Ink - Blueberry
  • Ink - Watermelon
  • Ink - Bubblegum
  • Copic Marker - Colorless Blender
  • Copic Marker -  R32 - Peach
  • Copic Marker - YG21 - Anise
  • Copic Marker - B24 - Sky Blue
Marvelous Marigolds


All Supplies Available from A Muse Studio

I will be holding a monthly workshop in my home in Huntington Beach, CA so let me know if you want to join me.  

Monday, September 12, 2011

Marker Mondays - September Part II

All supplies available from A Muse Studio

 For September we are using the following three Copic colors and the clear blender pen
  •  R32 - Peach
  • YG21 - Anise
  • B24 - Sky Blue
  •  0 - Blender Pen
This card is a simple card but it is so cute!  I cut my card base out of the Clouds paper and then used my Square Nestabilities to make a die cut in the front of the card.  The stamping is done on the inside of the card with the Black Memento ink.  Bicycles are so popular right now and I love the cute sentiment we have for this one: "Keep calm. Ride on."

Remember we are only using three colors here so I started by coloring the dark parts of the bike first with the Sky Blue.  Then I added the light parts using Anise.  Can you see how I feathered that into the blue parts to blend it?  It's the little touches that add so much to your image here. The basket is colored using Anise and Peach.  I blended them a tiny bit on part of the basket to make a third color to add some interest to the woven texture.

This image is so cute and tiny there's not a lot of room for blending so we are done!  If you want to add a bit of shadow under the wheels you can use your blender pen and the Sky Blue to add a wee bit of color there to help ground the image.  Hopefully you stamped plenty of extra images in your workbook so you can experiment!

Detail of finished colored image
Supplies Used:
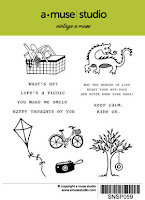
  • Vintage A Muse Stamp Set
  • Paper - Sugar, Clouds
  • Memento Black Pad
  • Copic Marker - Colorless Blender
  • Copic Marker -  R32 - Peach
  • Copic Marker - YG21 - Anise
  • Copic Marker - YG21 - Anise
  • B24 - Sky Blue
  • Nestabilities Squares - Large
Vintage A Muse


All Supplies Available from A Muse Studio

I will be holding a monthly workshop in my home in Huntington Beach, CA so let me know if you want to join me. 

Monday, September 05, 2011

Marker Mondays - September Part I

All supplies available from A Muse Studio
 For September we are using the following three Copic colors and the clear blender pen
  •  R32 - Peach
  • YG21 - Anise
  • B24 - Sky Blue
  •  0 - Blender Pen
We will also use the Blender Refill Solution and a small spritz bottle.  I like the Ranger Mini Misters.

If you want to prepare for the entire month's lesson you will also need:
  • Clouds paper (shown above)
  • Onyx paper
  • Shimmer paper - Sugar
  • A Muse Studio Onyx Ink
  • Memento Tuxedo Black Ink
  • Silver brads
  • Nestabilities - Large Square 
  • 3D Foam Mounts
Marvelous Marigolds
Vintage A Muse
All Supplies Available from A Muse Studio

I will be holding a monthly workshop in my home in Huntington Beach, CA so let me know if you want to join me. 

Monday, August 29, 2011

Marker Mondays - August Part IV

This card will use the blending techniques we have been practicing and you will learn a simple masking technique. Be sure to review the previous lesson if you need to.
All Supplies Available from A Muse Studio
For August are using the following three Copic colors:
  • 0 - Blender Pen
  • R29 - Lipstick Red
  • Y17 - Golden Yellow
For these images I used the brush to brush color technique that I explained last week.  If you are using the Originals markers (the square Copics) then I recommend switching to the brush tip.  It is easy to switch the tips and they are fairly inexpensive.  If you prefer not to do that you can still blend using your chisel and fine point by using the plastic palette technique to pick up the darker ink.

Stamp the large flower in the corner using your Memento Black ink and then color it using the technique that you practiced last time.  I colored the entire flower yellow and then added red in the center.  I darkened each petal as needed by adding a second layer of yellow and then using the marker to pick up some red and make the petals a darker orange.  Blend while the yellow is still wet and do each petal individually.  Add some yellow over the top if you need help blending.

Once the large flower is colored then you can mask it by stamping another flower onto a post-it note and cut carefully just inside the edges.  Place the post-it note flower over the colored flower to protect it and use the smaller flower stamps to stamp your papaya, orange and cherry flowers with our delicious rich ink.  Once it is dry you can remove the mask.

Stamp your sentiment, add pearls (color them first with your Copics if desired) and mount onto black card front and orange card base.  Voila!  This concludes your Copic lessons for August.  Next week I will give you a head's up on what is needed for September.

 Marigolds Card Supplies Used:

  • Marvelous Marigolds Stamp Set
  • Paper - Sugar, Onyx, Orange
  • Memento Black Pad
  • Copic Marker - Colorless Blender
  • Copic Marker -  Lipstick Red
  • Copic Marker - Golden Yellow
  • A Muse Studio Inks - Cherry, Papaya, Orange
  • Pearl Stickers - Sugar

Marvelous Marigolds

All Supplies Available from A Muse Studio

I will be holding a monthly workshop in my home in Huntington Beach, CA so let me know if you want to join me.

Monday, August 15, 2011

Marker Mondays - August Part III

Today we will practice and refine our blending techniques.  Be sure to review the last lesson if you haven't already.

Workbook notes and A Muse Studio coordinating ink samples
 For August are using the following three Copic colors:
  • 0 - Blender Pen
  • R29 - Lipstick Red
  • Y17 - Golden Yellow
For these images I used the brush to brush color technique that I explained in the last post.  If you are using the Originals markers (the square Copics) then I recommend switching to the brush tip.  It is easy to switch the tips and they are fairly inexpensive.  If you prefer not to do that you can still blend using your chisel and fine point by using the plastic palette technique to pick up the darker ink. 
You can make different flower colors with only three pens!
I have colored the top right flower with yellow ink and then used the yellow pen to blend red onto the center petals and make the flower into a deeper orange.  It takes time and practice but you can always color and then add more depth later on and blend out any parts you want to darken or fix.

The center yellow flower was colored first with the blender pen and then the blender pen is carefully used to make the pale yellow petals by taking ink from the Y17 pen or palette. This flower takes a little more practice and patience. 

The pink flower was the hardest because the red is so dark.  Work one petal at a time with the blender pen and pick up tiny amounts of red to blend with.  Practice, practice, practice!  I really did this flower using only the blender pen and the R29 ink.  You can too!

Practicing blending on Vanilla cardstock and Cocoa ink. Notice the warmer feel of the images?
It is fun to try the Copics on different backgrounds to see how they change.  I made the same yellow and orange flowers on Vanilla instead of Sugar paper to add some warmth.

Marvelous Marigolds

I will be holding a monthly workshop in my home in Huntington Beach, CA so let me know if you want to join me. 

Monday, August 08, 2011

Marker Mondays - August Part II

Let's start today's lesson by playing and getting used to our pens.  Here is the last post if you need to review or have questions about the workbook supplies and pages. For August we are using the following three Copic colors:
  • 0 - Blender Pen
  • R29 - Lipstick Red
  • Y17 - Golden Yellow


Start by stamping the kite image using Memento Black ink and let it dry.  In my workbook I like to label images as I color them by using the Copic Multiliner.  This is a waterproof pen that will not smear when you use your Copic Markers over it.  I can draw lines, take notes and then color over it just like I can with the Memento ink.  Make a habit of making color swatches like I did on the bottom left.  That way if you want to replicate a look later you know exactly what colors you used.
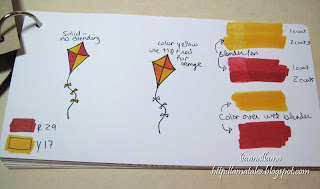

Workbook Page1
The kite on the left I colored using the markers with solid colors and no blending.  The kite on the right uses some blending techniques.  I colored the whole kite with yellow and then I blended using my yellow pen and picked up red ink from a palette onto the yellow pen to make orange.  I made a palette by scribbling some red ink onto a piece of plastic.  Any plastic will do, including  an acrylic block, plastic palette or a scrap of a cellophane wrapper.
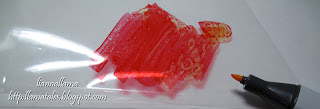
Palette Blending
A second way of blending is the tip to tip method where you pick color directly from the tip of your dark marker onto your light marker and use it to color.  The best part about using Copics instead of water-based markers is you can wipe off the excess color onto your paper when you are done and the marker is as good as new!  The ink does not stain the marker when you blend colors.  Try it out and be sure to practice because with blending you will get better with more you do it. 
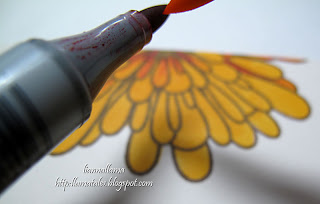
Tip to Tip Blending
Use your workbook to practice blending and be sure to play with the pens.  Look at the right side of my workbook page and see how I experimented with different layers of marker.  Letting each coat dry before adding another will make a darker color that you can use to subtly deepen shadows without having to use a darker color pen.  The blender pen acts as a sort of ink-removal system so you can use it to erase or lighten colors for highlights.  If you color over the wet blender, it acts as a sort of primer and helps spread the ink over the paper for easy blending.

If your paper gets too wet the ink may start to spread too easily; simply let it dry and then you can use your markers again to re-blend and fix anything you want.  If your coloring is not solid and looks streaky then you are not using enough ink.  Be sure to saturate the paper thoroughly and the ink should show through on the back (unless you are using extra-thick paper).  Don't be afraid to use lots of ink because your paper will not pill and tear the way it does with regular water-based markers.
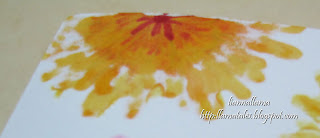
Back side of colored flower
 Once you have had a chance to play then you can color the image for your card and finish it! 
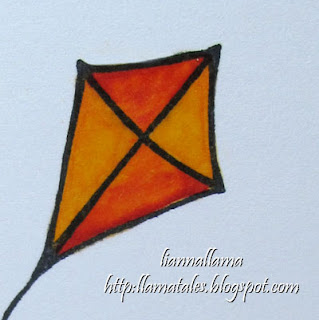
Detail of finished colored image
Kite Card Supplies Used:
  • Vintage A Muse Stamp Set
  • Paper - Sugar, Orange, Cranberry
  • Gingham Paper - Orange
  • Memento Black Pad
  • Copic Marker - Colorless Blender
  • Copic Marker -  Lipstick Red
  • Copic Marker - Golden Yellow
  • 3D Foam Adhesive
  • Nestabilities Scallop Rectangle - Small
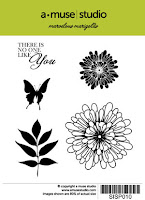
Marvelous Marigolds
Vintage A Muse

I will be holding a monthly workshop in my home in Huntington Beach, CA so let me know if you want to join me.  

Monday, August 01, 2011

Marker Mondays

Do you want to learn how to use - Copics with me?  Let's start a new adventure where you can learn and have an easy way to start your Copic collection without having to buy a ton of markers at once.  With my class we will use three markers each month (plus the blender pen) to make some awesome creations.  I picked some of my favorite and most useful colors so we will have a great collection and actually be able to use the markers we have.  We will end up with workbook pages and two cards each month using our three colors.

Workbook Cover
For my workbook cover you can see that I used one flower for each of the five months and colored  each flower using the three monthly colors.  I used Kraft paper for fun but you can use whatever you want.

For August we will use the following three Copic colors:
  • 0 - Blender Pen
  • R29 - Lipstick Red
  • Y17 - Golden Yellow
You can use Ciaos, Sketch or you can buy the Originals from my A Muse Studio Webstore (or anywhere else you like).

Here are the other supplies I used for the August Workbook and almost everything is available from A Muse Studios or feel free to substitute your favorite brands.
  • Kraft Cardstock
  • Sugar Cardstock
  • Vanilla Cardstock
  • School Lined Cardstock 
  • Marvelous Marigolds Stamp set
  • Personal Stationery Stamp Set (optional)
  • Memento Black Ink
  • Memento Rich Cocoa Ink (optional)
  • Copic Multiliner (I use the 0.5 size) 
  • Corner Rounder
  • Crop-a-Dile or hole punch
  • Scrap of Cellophane paper wrapper
  • 2" Metal Ring (from office supply store)
To start your workbook cut the papers to 8.5" x 4.25" as following:
  • 2 Kraft (for the covers)
  • 2 Sugar
  • 1 Vanilla
  • 1 School Lined
Round the right side's corners and  punch a hole in the left corner using your crop-a-dile.  The metal ring is to hold it together when we're done.  I recommend working on the pages individually and put them in the ring after you finish.  Otherwise your Copics may bleed through to the next page and it won't look as clean!

Marvelous Marigolds
Vintage A Muse

I will also be holding a monthly workshop in my home in Huntington Beach, CA so let me know if you want to join me.