Saturday, January 21, 2012

Sneak Preview - Day 9

How about a cheerful card for a friend?  I think that there's nothing more cheerful than orange and yellow (or Orange, Bellini and Papaya!)  Remember my hint about another glitter color?  I am using the new Orange Glitter today with the Hey Cupcake stamp set.
A Muse Studio Sneak Peek!

All Supplies from A Muse Studio.
  • Stamps: Hey Cupcake (new!), Swanky Backgrounds
  • Cardstock: Bellini Venetian Pattern (new!), Orange, Bellini (new!), Sugar, Orange Gingham
  • Inks: Bellini (new!), Papaya, Lemon Whip
  • Diamond Embossing Powder
  • Orange Glitter (new!)
  • Pumpkin Buttons
  • 1/4" Sticky Tape
  • Glue Dots
  • 3D Foam Adhesive
Fun Fact of the Day:
Bellini was a 19th-centruy opera composer and is also the name of a delightful drink made with champagne and peach.  I think some beautiful music and a breakfast cocktail is a wonderful way to start the weekend!

Friday, January 20, 2012

Sneak Preview - Day 8

Yellow (or should I say "Lido") adds a little punch to a vintage look today.  Vintage stamps have always been one of my true loves and the Come Fly with Me set has just the right mix!

A Muse Studio Sneak Peek!

All supplies from A Muse Studio.
  • Stamps: Come Fly with Me (new!)
  • Ink: Titian (new!)
  • Cardstock: Lido (new!), Titian (new!), Pebble
  • Sponge Daubers
  • 3D Foam Tape

Fun Fact of the Day:
Lido is one of the words for "beach" in Italian and there are several towns with the prefix "Lido".  It also refers to a beach or pool area; especially on a cruise ship.  Now you know why they called it the Lido deck on the Love Boat!  "Issac, could you please bring me a drink?"

Thursday, January 19, 2012

Sneak Preview - Day 7

I wanted to feature more Pistachio for you today and I just had to combine it with a soft brown.  I'm thrilled that the Cocoa cardstock that was released for the holidays will continue as part of the A Muse Studio Signature Color palette.  I hope that means there will be matching ink too!  Did you also notice the first peek at the French Roast Glitter!?  I LOVE glitter and they just gave us 4 more colors (hmmmm...I've only shown three so far—there must still be one left to show!)

A Muse Studio Sneak Peek!
All supplies from A Muse Studio.
  • Stamps: Charming Gardeners (new!), Hand Scripted
  • Cardstock: Pistachio (new!), Cocoa, French Roast Gingham
  • Ink: Memento Rich Cocoa
  • French Roast Glitter (new!)
  • Brown & White Baker's twine
  • Copic Markers: 0, BG10, BG13
A Muse Studio Sneak Peek!
Tip of the day:
To tie the tiny bow I found it easiest to secure a flat piece of twine around the cardstock; taping it to the back.  Then I took a separate piece of twine and tied a bow using the two loop "bunny ears" method.
 

Wednesday, January 18, 2012

Sneak Preview - Day 6

This new set is probably my favorite.  I love the fun retro space theme!  This set will be fun for birthdays and cards for all my nerd friends--Beam me up!
A Muse Studio Sneak Peek!
All supplies from A Muse Studio.
Stamps: Greetings Earthling stamp set (new!)
Ink: Navy, Memento Tuxedo Black
Cardstock: Burano (new!), Burano Venetian Pattern (new!), Blueberry, Buttercup
Copics: W2, B00, B02, 0

Tuesday, January 17, 2012

Sneak Preview - Day 5

Are you feeling festive today!?  It's Birthday time!  This card shows off two new sets: "Hey Cupcake" and "On Broadway Alphabet"  It also features some of the new Signature colors: Grapefruit, Pistachio & Grape.
A Muse Studio Sneak Peek!
This card started out simple, because I was going to stamp it all on a Pistachio card front.  But then I decided the candles needed to be white so I could get just the right colors with my Copics.  And I didn't like the way I stamped the alpha for "Happy" So I decided to cut the letters out individually after stamping with Grape and embossing with the Diamond.  The "Birthday" from Hey Cupcake needed to be matted to make it stand out and then the row of candles...well, those candles just weren't going to make me happy until I cut each and every one of them and mounted them!  So it took much longer than I thought it would but I love the results!

All supplies from A Muse Studio.
  • Stamps: Hey Cupcake (new!), On Broadway Alphabet (new!)
  • Cardstock:  Grapefruit (new!), Pistachio (new!), Grape (new!) and Sugar
  • Inks: Grape (new!), Onyx, Memento Tuxedo Black
  • Diamond Embossing Powder
  • 3D Foam Squares
  • Copic markers: 0, W2, Y08, Y17, BG10, B02, BV00, R32
Tip of the Day:
Have you tried our 3D Foam Mounting Squares yet?  I use them on almost every card I make and they are pre-cut in different sizes to make them so convenient!  The smallest size was perfect for the candles and alpha and saved me time since I didn't have to cut each piece to fit!  There are 442 pieces in a package for $3.95 so I think it's a great buy!

Monday, January 16, 2012

Sneak Preview - Day 4

I wanted a simple and elegant card to send to a friend.  Today's design fits the bill. I added just the right amount of glitter to the flowers so they would sparkle without overwhelming.  It also gave me a chance to show off two new Signature Colors (Pistachio and Seattle) along with new stamps and the new Champagne Glitter! 

A Muse Studio Sneak Peek!
Isn't the sentiment lovely?

"Let us be grateful to people who make us happy, they are the charming gardeners who make our souls blossom." 
~ Marcel Proust

Supplies from A Muse Studio.
  • Stamps: Charming Gardner (new!)
  • Cardstock: Pistachio (new!), Seattle (new!)
  • Ink: Pistachio (new!), Seattle (new!), Onyx
  • Champagne Glitter (new!)
Just for fun I made three more of this design using some of our other pastel colors.  Counterclockwise, from the top left you have Winter Sky, Lemon Whip, Pistachio, and Blush.  All are mounted on Seattle Paper.


A Muse Studio Sneak Peek!
You can see how nicely the Pistachio fits in with the pastels and it's really the perfect "baby-shower green"  Seattle is a mid-tone, warm grey and it fits exactly between our Pebble and Slate colors (you can see the Pebble in the background here for comparison).

Sunday, January 15, 2012

Sneak Preview - Day 3

Today I wanted to share one of the stamps from the "Charming Gardeners" set.  You'll be seeing a lot of this set because it is so pretty!

A Muse Studio Sneak Peek!
I stamped the large fern on Sugar paper in Burano (light, bright red), Bellini (light orange), and Grapefruit (warm, bright pink) ink.  See how nicely the Grapefruit pairs with other colors?  I matted each one against cardstock to match the ink and then mounted it with foam tape onto Slate paper.  Sentiment from the "Essential Sentiments" set is stamped with Black Versafine ink.

All Supplies from A Muse Studio.
  • Stamps: Charming Gardners (new!)
  • Ink: Burano (new!), Bellini (new!), Grapefruit (new!), Black Versafine
  • Cardstock: Burano (new!), Bellini (new!), Grapefruit (new!),Slate, Sugar
Fun fact for the day:
Burano is an island city just off the coast of Venice in Italy.  It is famous for its brightly-colored rows of houses.  Legend has it that each house was painted a unique color so the fishermen who lived there could find their way home.  In any case it looks so beautiful and it is on my list of places I dearly want to visit!

Saturday, January 14, 2012

Sneak Preview - Day 2

Are you ready for another sneak?  This time I am featuring three new products:
  • Grapefruit Cardstock
  • Lime Glitter
  • Keep Calm stamp set
A Muse Studio Sneak Peek!
I used my 1/2" and 1/4" sticky tape to adhere the glitter, rounded the top cornet and stamped using Black Versafine ink.  Add some twinkle stickers (I used the lime ones and large clear ones colored with Copic YG23) and you're done!

I really like the Grapefruit color; it fits right between our Watermelon and Bubblegum colors.  It looks terrific paired with Grass or Lime, Ocean, Blueberry or our new Bellini.

All supplies from A Muse Studio.
  • Stamps: Keep Calm (new!)
  • Cardstock: Grapefruit (new!)
  • Ink: Onyx
  • Lime Glitter (new!)
  • Lime Twinkle Stickers
  • 1/4" and 1/2" sticky tape 
  • Corner Rounder 

Friday, January 13, 2012

Sneak Preview!

 Are you excited about the A Muse Studio catalog coming out next month?  We got to order some special sneak preview items to show off!
A Muse Studio Sneak Peek!
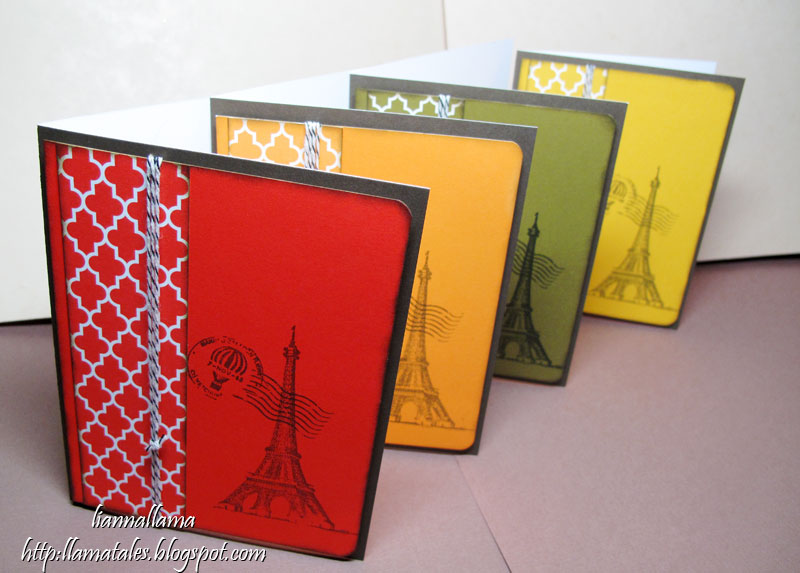
These cards feature the new Venetian Limited-Edition Color Palette.  These five stunning new colors are going to be some of my favorites this year for sure!  All cards are mounted on a Titian brown base and use the black and white baker's twine.  The Eiffel Tower and Postmark are from the Come Fly with Me stamp set and are stamped in Titian ink (except the green one which I stamped in Versamark Black).  

A Muse Studio Sneak Peek!
 Colors from left to right are: Burano (electric red), Bellini (soft orange), Rialto (olive green) and Lido (curry yellow).  Starting on Feb 1 you will be able to purchase the solid and patterned cardstock, satin ribbon, ink and reinkers.

All card supplies from A Muse Studio.
  • Stamps: Fly with me (new!)
  • Cardstock: Venetian patterns (new!), Venetian Solids (new!)
  • Ink: Titian (new!), Versafine Black
  • French Roast and White Baker's Twine
  • Sponge Daubers
A Muse Studio Sneak Peek!
I used some of my scraps to make a fun ATC using the stamp set too!  I used a discontinued French Script stamp in Bellini over the Bellini cardstock, but don't worry--A Muse Studio sells one almost exactly like it! Eiffel Tower and postmark are stamped in Versafine Black and the border pattern is part of the postmark stamped in Titian on Cranberry.  The airmail border is stamped with Burano on Sugar cardstock and the sentiment is Titian on Burano cardstock.  Edges are sponged with Titian.  I'm not sure if the sentiment is a blessing or a curse; I guess it depends on who gets it, ha ha!

ATC supplies from A Muse Studio.
  • Stamps: Fly with me (new!)
  • Cardstock: Burano (new!), Bellini  (new!), Cranberry, Sugar
  • Ink: Burano (new!), Bellini (new!)Titian (new!),Versafine Black
  • Sponge Daubers

Tuesday, January 10, 2012

Studio Stampers Blog Hop - January

All Supplies from A Muse Studio
Welcome to the Studio Stampers January blog hop.  If you are joining us in the hop you should have come from Angela, if not why not start at the beginning with Karen?

We are getting ready to say goodbye to some of my favorite A Muse Studio products to make room for new things.  

Today my thank-you card features the Sushi & Wasabi stamp set.  If you love it make sure to get it quickly because once it sells out you will be sad!  The same thing with the Cranberry cardstock that is matted behind the main image.  For details please see the discontinued list on my A Muse Studio site.


All Supplies from A Muse Studio
Card Details
Cardstock: Blush, Cranberry
Stamps: Sushi & Wasabi
Ink: Memento Black
Copic Markers: R24, RV14
Baker's Twine: Red & White


Your next stop is:

Here is the hop list:
Lianna Vigil  - You Are Here

Thursday, December 01, 2011

Memory Box Holiday

 Ahh--I fell in love with the Memory Box Holiday collection!  You can get any of the stamps and supplies you need at http://www.thestamproprietor.com/

Memory Box Stamps
 This little bear card was so easy to make.  I punched a snowflake border out of white cardstock and then stamped and colored the bear with my Copics.  Don't forget to add a little shadow underneath the bear with your BG10 marker!

Memory Box Stamps, Die and Paper
 These cute little guys are ready for the first snow in their warm scarves! Colored with Copics and mounted on a sheet of their holiday paper--so pretty!  Do you notice the fancy red die on the bottom?  That's one of theirs too!
Memory Box Stamps
 This Clean and Simple Card was my favorite from the whole collection.  I stamped it on a rough-toothed paper and then colored with my Prismacolor pencils.  I wanted a rough-sketched look so I didn't even use my Odorless Mineral Spirits with this one--I left the pencil unblended.  I punched a fancy edge and then mounted a bit of Memory Box patterned paper on the inside of the card to let it peek through.
Memory Box Stamps, Paper and Die
The red dots are another sheet of my 6x6 pad and I used some pretty mulberry paper behind the main image.  I spritzed it with Smooch Spritz to make it sparkle.  The sentiment was punched, stamped and then covered with Versamark and then heat embossed with clear Diamond embossing powder. For the main image I stamped and colored with my Copics and then put some clear double-sided sticky tape on top.  I then sprinkled it with Glitter Ritz clear iridescent glitter.  I finished by adding more detail with my Copics over the glitter.

Monday, September 19, 2011

Marker Mondays - September Part III

 For September we are using the following three Copic colors and the clear blender pen
  •  R32 - Peach
  • YG21 - Anise
  • B24 - Sky Blue
  •  0 - Blender Pen
This lesson is going to be a little different (and uglier!) so I apologize in advance.  Our next lesson will be using the shimmer paper so I wanted to experiment with different techniques to show you.  The shimmer paper is so lovely--it looks like an icicle or a pearl with a beautiful sheen to it and a perfect weight.  I am using the Sugar color and it is more of an Antique White instead of hard white.  The colors of this paper are colored or printed on one side and white on the other side.

The picture below shows how I tested the memento inks.  You can use this ink on the shimmer paper but you must be very careful to not go over the lines so you don't smear it.  I recommend writing on this paper using a Copic Marker set with a superfine tip.  The Multiliner pen will take FOREVER to dry.

Memento ink will spear on the shimmer paper and the Copic Multiliner pen will take a long time to dry. 
 Below you can see where I embossed using Versafine and Black EP. It also smears and the Copic solution will dissolve the EP so I don't recommend embossing either unless you are careful not to color over the lines.

But a bonus is that the paper works wonderfully with our A Muse Studio ink if you just want to stamp.  See the Blueberry flower in the corner?  That is our ink and it looks beautiful.  Still, it will smear if you color over it with the Copics.
Embossing will also smear with the Copics.  If you want to emboss be careful to stay in the lines!
Below are my notes on the shimmer paper.  The cute Snoopy stamp is one that I got in Japan.  I stamped with Brown Memento ink and colored it very carefully so I didn't color over the lines.

 Things to remember with Shimmer Paper and Copics:
  • Shimmer Paper is BEAUTIFUL
  • Shimmer Paper is touchy
  • Memento washes off and smears
  • Copic breaks down embossing
  • Multiliner takes a long time to dry
  • Copic ink will spread differently on this paper because it does not sink into it like regular cardstock.  It lays on the surface and make pools and patterns.  (You can see this effect best if you look at the blue petals in the picture above.)

Shimmer Paper notes and swatches

Supplies Used:
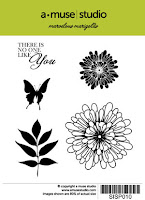
  • Marvelous Marigolds Stamp Set
  • Shimmer Paper - Sugar
  • Memento Black Pad
  • Versafine
  • Black Embossing Powder
  • Multiliner
  • Black Copic Marker
  • Ink - Blueberry
  • Ink - Watermelon
  • Ink - Bubblegum
  • Copic Marker - Colorless Blender
  • Copic Marker -  R32 - Peach
  • Copic Marker - YG21 - Anise
  • Copic Marker - B24 - Sky Blue
Marvelous Marigolds


All Supplies Available from A Muse Studio

I will be holding a monthly workshop in my home in Huntington Beach, CA so let me know if you want to join me.  

Monday, September 12, 2011

Marker Mondays - September Part II

All supplies available from A Muse Studio

 For September we are using the following three Copic colors and the clear blender pen
  •  R32 - Peach
  • YG21 - Anise
  • B24 - Sky Blue
  •  0 - Blender Pen
This card is a simple card but it is so cute!  I cut my card base out of the Clouds paper and then used my Square Nestabilities to make a die cut in the front of the card.  The stamping is done on the inside of the card with the Black Memento ink.  Bicycles are so popular right now and I love the cute sentiment we have for this one: "Keep calm. Ride on."

Remember we are only using three colors here so I started by coloring the dark parts of the bike first with the Sky Blue.  Then I added the light parts using Anise.  Can you see how I feathered that into the blue parts to blend it?  It's the little touches that add so much to your image here. The basket is colored using Anise and Peach.  I blended them a tiny bit on part of the basket to make a third color to add some interest to the woven texture.

This image is so cute and tiny there's not a lot of room for blending so we are done!  If you want to add a bit of shadow under the wheels you can use your blender pen and the Sky Blue to add a wee bit of color there to help ground the image.  Hopefully you stamped plenty of extra images in your workbook so you can experiment!

Detail of finished colored image
Supplies Used:
  • Vintage A Muse Stamp Set
  • Paper - Sugar, Clouds
  • Memento Black Pad
  • Copic Marker - Colorless Blender
  • Copic Marker -  R32 - Peach
  • Copic Marker - YG21 - Anise
  • Copic Marker - YG21 - Anise
  • B24 - Sky Blue
  • Nestabilities Squares - Large
Vintage A Muse


All Supplies Available from A Muse Studio

I will be holding a monthly workshop in my home in Huntington Beach, CA so let me know if you want to join me. 

Sunday, September 11, 2011

In Remembrance

This post is in Remembrance for Lisa Frost and all the others who were affected by the events that happened ten years ago.  I didn't know Lisa but she lived in the town where I used to live; Rancho Santa Margarita.  Here are some pictures of her memorial by the lake.  You can read more about her here.

Here is my post I did five years ago as part of the 2,996 Project to honor those who lost their lives on this day.

I can't believe that it's been ten years since this happened.  The sorrow I felt from that day and other events that were happening at the time changed my whole life.  I resolved to enjoy more moments in my life and not take any minute of any day for granted.  I resolved to take better care of my life and my self and to cherish every moment that I can.  I became a little more serious and a little more careful.  I try to live more in the moment and worry less about the future (which you know does not come easy for me!) I try to be gentle with myself and those around me.  I hope that 9/11 has made me a better person, despite the pain that we all still feel for this day.  (((HUGS))) and prayers to everyone as we go on with our lives and live our moments today.

Saturday, September 10, 2011

Studio Stampers September Blog Hop

Welcome to the Studio Stampers Blog Hop.  You should have come from Lisa's Blog.  If you want to go to the beginning go to the Studio Stamper's Blog

This month I am hosting some fun treat workshops so people can make Halloween treats for school, work, or whatever they want.  These boxes are so fun and easy to make and you can fill them with anything you like.  I filled mine with about 10 Starburst or 5 Tootsie Roll Minis.

See below for scoring template. Cut out and score as indicated and stamp as desired.  I rounded my corners because I thought it added a nice touch but that is optional.  Punch holes in the top corners of the box and then fold the box up to measure the holes on the opposite sides.  Punch the remaining two holes (each corner will now have a hole) and thread through with pretty ribbon and tie in a knot at the top after filling with goodies.  Add a die-cut seal or decoration on top and you are good to go!

All Supplies Available from my A Muse Studio Store
Your Next stop is Angie's Blog

Supplies used:  
Stamps - A Very Spooky Boo Day, Make a Scene
Ink - Nutmeg & Squash or
Onyx & Orange Papers - Kraft; French Roast & Squash or Onyx & Orange
Dies - Nestabilities Classic Scallop Circle and Circle dies
Accessories -
French Roast or Orange Satin Ribbon


Cut paper 8 1/2" x 3 1/2" and score on gray lines as shown.
Here is the blog list in order:

Monday, September 05, 2011

Marker Mondays - September Part I

All supplies available from A Muse Studio
 For September we are using the following three Copic colors and the clear blender pen
  •  R32 - Peach
  • YG21 - Anise
  • B24 - Sky Blue
  •  0 - Blender Pen
We will also use the Blender Refill Solution and a small spritz bottle.  I like the Ranger Mini Misters.

If you want to prepare for the entire month's lesson you will also need:
  • Clouds paper (shown above)
  • Onyx paper
  • Shimmer paper - Sugar
  • A Muse Studio Onyx Ink
  • Memento Tuxedo Black Ink
  • Silver brads
  • Nestabilities - Large Square 
  • 3D Foam Mounts
Marvelous Marigolds
Vintage A Muse
All Supplies Available from A Muse Studio

I will be holding a monthly workshop in my home in Huntington Beach, CA so let me know if you want to join me. 

Thursday, September 01, 2011

Holiday Catalog Blog Hop

Welcome to the special Holiday edition of the A Muse Studio Blog Hop. If you are participating in the blog hop, you should have come from Pamela Fredrickson's blog and if not, then you should start from the beginning with Samantha's blog until you come to my blog.

Do you love Halloween crafting as much as I do?  I can't resist any stamps with witches or bats and the new A Muse Studio sets were right up my alley so I had to get them the first day I could order!  They will be useful for so many fun things from treat bags, to cards to decorations!

All supplies available on my A Muse Studio Webstore
I stamped the tree using Squash ink on Pumpkin paper and cut it out using fine tip scissors.  I then used the Woodgrain Background on top of the tree (French Roast) and the card front (Nutmeg) to add some interest.  The black plate was embossed using the Web/Swirls impression plate and cut to size.  The bats were a piece of Sugar scrap paper that I covered with the gridded washi tape before cutting it with the bats die.  Glue the bats down using your quickie glue, stamp your sentiment and pop up the tree using the foam squares.  A knotted ribbon completes the look.

A Muse Studio Supplies Used:
  • Stamps - Spooky Boo Day* , Too Cute to Spook* , Woodgrain Background
  • Papers - Pumpkin, Orange, Onyx
  • Inks - Nutmeg, Squash, French Roast, Onyx
  • Impression Plates - Web/Swirls*
  • Dies - Bat Trio Die*
  • Ribbon - 1/4" Stitched Grosgrain
  • Other - Washi Tape - Winter, Quickie Glue, 3-D Foam Adhesive
* Holiday Catalog Items


Your next stop is Amber Smith's blog.

Do you want me to send you this card and a sample of our two new paper colors?  Email me your snail address (liannallama AT gmail D0T com) and I will mail one lucky crafter this card and a Holiday Catalog too if you want, just let me know!

Monday, August 29, 2011

Marker Mondays - August Part IV

This card will use the blending techniques we have been practicing and you will learn a simple masking technique. Be sure to review the previous lesson if you need to.
All Supplies Available from A Muse Studio
For August are using the following three Copic colors:
  • 0 - Blender Pen
  • R29 - Lipstick Red
  • Y17 - Golden Yellow
For these images I used the brush to brush color technique that I explained last week.  If you are using the Originals markers (the square Copics) then I recommend switching to the brush tip.  It is easy to switch the tips and they are fairly inexpensive.  If you prefer not to do that you can still blend using your chisel and fine point by using the plastic palette technique to pick up the darker ink.

Stamp the large flower in the corner using your Memento Black ink and then color it using the technique that you practiced last time.  I colored the entire flower yellow and then added red in the center.  I darkened each petal as needed by adding a second layer of yellow and then using the marker to pick up some red and make the petals a darker orange.  Blend while the yellow is still wet and do each petal individually.  Add some yellow over the top if you need help blending.

Once the large flower is colored then you can mask it by stamping another flower onto a post-it note and cut carefully just inside the edges.  Place the post-it note flower over the colored flower to protect it and use the smaller flower stamps to stamp your papaya, orange and cherry flowers with our delicious rich ink.  Once it is dry you can remove the mask.

Stamp your sentiment, add pearls (color them first with your Copics if desired) and mount onto black card front and orange card base.  Voila!  This concludes your Copic lessons for August.  Next week I will give you a head's up on what is needed for September.

 Marigolds Card Supplies Used:

  • Marvelous Marigolds Stamp Set
  • Paper - Sugar, Onyx, Orange
  • Memento Black Pad
  • Copic Marker - Colorless Blender
  • Copic Marker -  Lipstick Red
  • Copic Marker - Golden Yellow
  • A Muse Studio Inks - Cherry, Papaya, Orange
  • Pearl Stickers - Sugar

Marvelous Marigolds

All Supplies Available from A Muse Studio

I will be holding a monthly workshop in my home in Huntington Beach, CA so let me know if you want to join me.

Thursday, August 25, 2011

Goosebumps Cards

There's a new project from Tsukineko called Goosebumps.  I recently got a chance to try it and teach some of the stampers at our LSS about my findings.  Below are two of the projects we made.  I donated my cards to Operation Write Home to send a little love overseas for our Heroes.

Goosebumps sprayed on white paper as a background resist
For the first project (above) we simply spritzed some goosebumps on the paper and let it dry.  Once it is dry you can sponge on your favorite dye ink (I used Tim Holtz distress inks) and wipe any excess off with a damp towel.  The light blue part of the card is the TH ink and the white is where the Goosebumps acted as a textured resist.  It looks like a shiny, bumpy plastic.  Once you use the Goosebumps you will need to use Stazon to stamp over it so the teal leaves (Wendy Vecchi)  and  black sentiment (Auntie Amy) are stamped with Stazon.  I mounted it simply to a navy cardstock and then a purple card base.  I added some pretty rhinestones to give the card a little bling.

Goosebumps sprayed onto rubber and then image stamped on white paper
For our second project we sprayed directly onto the stamp instead of using ink.  A bold image works best for this.  I used another Wendy Vecchi image to make the white foliage at the bottom of the card.  It will give a blotchy effect and not the precise definition you are used to with ink.  Once the Goosebumps is dry you can swipe your dye ink over the card (again, I used Tim Holtz Distress for this in two different colors) and wipe any excess ink off the resist image with a damp towel.  I used black India Ink to stamp the "delight" sentiment from Stampin' Up.  Add a pretty ribbon and mount to your card base and you're done!  The card is easy and has a lot of impact.

Here are some tips I found while I was working with the Goosebumps:
  • Clean your stamps IMMEDIATELY after you use them with a good cleaner like Ultra Clean.  
  • Be careful because the Goosebumps may permanently stick to your acrylic blocks or will take lots of work to remove (sigh!)
  • IMMEDIATELY clean the whole Goosebumps pump with soapy hot water after you use it or it will get clogged.  I thought I just needed to rinse it off but you really need to remove it and clean it all thoroughly.  
  • It will still clog the tip of the sprayer so be sure to clean it with a pin and do some test spritzing before use or you will get blotchy sprays.
  • I was unable to get good results with the technique where they used a brass stencil.  Maybe my tip was too clogged and blotchy.
  • I was unable to get good results with the technique where they used a clean stamp to remove the goosebumps from the paper.  Maybe I was spraying too much Goosebumps onto the paper (again, could be the clogged tip)
  • I learned this was a little too much trouble to be my favorite technique but I did like the cards I ended up with.

Here is a link to the Tsukineko education sheet to give you more tips and techniques.  Let me know your experience with Goosebumps and any tips to help us out!

Tuesday, August 23, 2011

Studio Stampers Blog Hop

Welcome to our A Muse Studio Blog Hop for Krystie's Muses group.  You should have come from Kari's Blog.  If you want to go to the beginning go to Krystie's Blog

All Supplies available from my A Muse Studio Webstore
Supplies used: Stamps - Too Cute To Spook
Ink - Onyx
Papers - Wasabi, Spooky Hollow, Slate Woodgrain
Dies - Classic Tags Die Set, Web Die
Accessories - Onyx & White Baker's Twine-


Your next stop is Kellie's Blog


Here is the blog list in order: